Insider threats are a growing aspect of cybersecurity, as statistics show that organizations spend 60% more money on detecting insider attacks today than about three years ago. These growing threats are because your employees have access to sensitive data within your organization, and they can easily steal this data through removable drives. Most flash drives and removable storage today can store up to 1TB of data, so it's easy to move large amounts of data quickly.
To avoid such unfortunate incidents, companies take security measures to prevent employees from stealing sensitive data and selling it to others for financial gain. One such security measure that we'll discuss in this article is locking down USB ports.
What is USB Port Lock Down?
In this security strategy, organizations disable the USB ports of devices, so employees can't transfer any data to removable devices. Typically, disgruntled employees would want to steal as much data as possible, so removable drives are the easiest option. Moreover, it may be impossible to transfer such sensitive data by email, especially if the organization has filters to flag such content. Also, email messages are easy to track and organizations can quickly trace the employee. This is why USB port lockdowns are important because you essentially close out the option for employees to steal sensitive information.
Now that you understand the importance of locking down your USB ports to prevent insider threats, let's look at some ways to do it.
Use the Registry Editor
A simple way to disable USB ports is through the registry editor. Here's a step-by-step guide on disabling USB ports.
- Open the Registry window. To do this, press Windows + R to open the Run dialog box and type “regedit.exe” to open the registry.
- On the left-hand pane of your registry, navigate to HKEY_LOCAL_MACHINE > SYSTEM > CurrentControlSet > Services > USBSTOR.
- Click on USBSTOR and the corresponding right-hand pane, and click “Start.” This will open the DWORD (32-bit) window.
- To disable the USB port, look for a field called “Value data” and enter the value “4” in it.
- Restart your computer for the changes to take effect.
You can enable the USB ports at any time. Simply enter “3” in the “Value data” field to enable these ports.
Disable Through the Device Manager
The second option is to enable or disable USB ports through the device manager, and here's how you can do it.
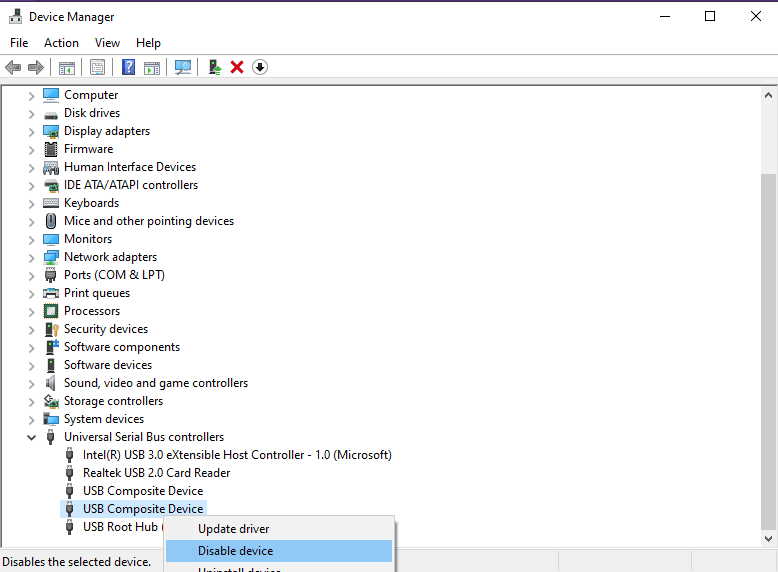
- Head to Device Manager. You can navigate through the Control Panel or press Windows + X and select Device Manager.
- Click on the Universal Serial Bus Controller to view all the configured USB ports on your device.
- Right-click on any of these ports and choose the “Disable” option. To enable, right-click on the port and choose “Enable”.

With the above steps, you can disable as many USB ports as you want.
Disable During BIOS Setup
The method that we're going to discuss now is slightly more complex than the previous two options. In this option, you can disable your USB ports while the device boots. Let's look at the steps involved.
- Press F1, F2, F10, Delete, or ESC while your computer is booting. This opens the BIOS setup for you.
- Next, look for the option to enable or disable the USB ports and navigate to them. Make the necessary changes.
- Press the F10 key to save and exit the BIOS.
Once the computer completes booting, you can see the changes you made.
Physical Removal
You can remove the USB ports located on the front and top of the computer. All that you have to do is simply unplug the computer from the USB header. This method prevents users from attaching USB devices. However, not that you can't remove the USB devices that are connected to the motherboard.
In all, you can use any one of these methods to enable or disable USB ports on your device.
Disabling USB Ports on the Enterprise Network
The above-discussed methods are ideal for disabling/enabling ports on a single device. However, it can get laborious to do it on all the devices in an organization. A better option is to have a tool that will centrally allow you to disable all computers in one go. You can also use scripts to enable and disable USB ports.
Assign Deny Permissions for a Group
You can assign “Deny” permissions to entire groups or teams. To do this, follow the below steps.
- Open the Run dialog box and type “%SystemRoot%\Inf\”. Alternatively, navigate to this location through Windows Explorer.
- Right-click the Usbstor.pnf file and select “Properties”
- Navigate to the Security tab.
- Under the Group or User list, add the group or the individual.
- Look for Permissions for UserName or GroupName and here, check the Deny option under Full Control.
- Do the same for the Usbstor.inf file as well.
With this, you can effectively deny USB access to specific groups.
PowerShell Scripts
Another good option is to use PowerShell scripts to disable USB ports. Needless to say, you require good scripting knowledge for this method to work.
Start by connecting remotely to the device on which you want to disable USB ports. The command for establishing a remote connection is,
Enter-PSSession Server01
Once you're connected to this device, simply run the below command and this will disable the port for you.
Set-ItemProperty -Path “HKLM:\SYSTEM\CurrentControlSet\Services\USBSTOR\” -Name “start” -Value 4
If you notice, the script is exactly the steps we saw earlier for changing the value of a registry variable. This means you'll have to remotely connect to each device and disable the USB ports on them. As this is not exactly the most intuitive way to lock down USB ports, let's look at an easy and comprehensive solution next.
Using Third-Party Tools
Many third-party tools make it easy to disable and lock down USB ports across your entire organization. Often, it's done with one or a few clicks which can save a lot of time and effort for you. More importantly, you have complete visibility on which devices have open or disabled USB ports, so you can accordingly manage these ports better. Another advantage is that you can ensure that your USB port management adheres to your organization's security policies.
This ease of use and effectiveness are some defining reasons for the popularity of third-party USB lockdown tools. One such tool that's well-used across organizations of all sizes is CoSoSys Endpoint Protector. Let's learn more about this tool and how it effectively locks down your USB ports to prevent insider attacks.
ThreatLocker Storage Control – FREE TRIAL
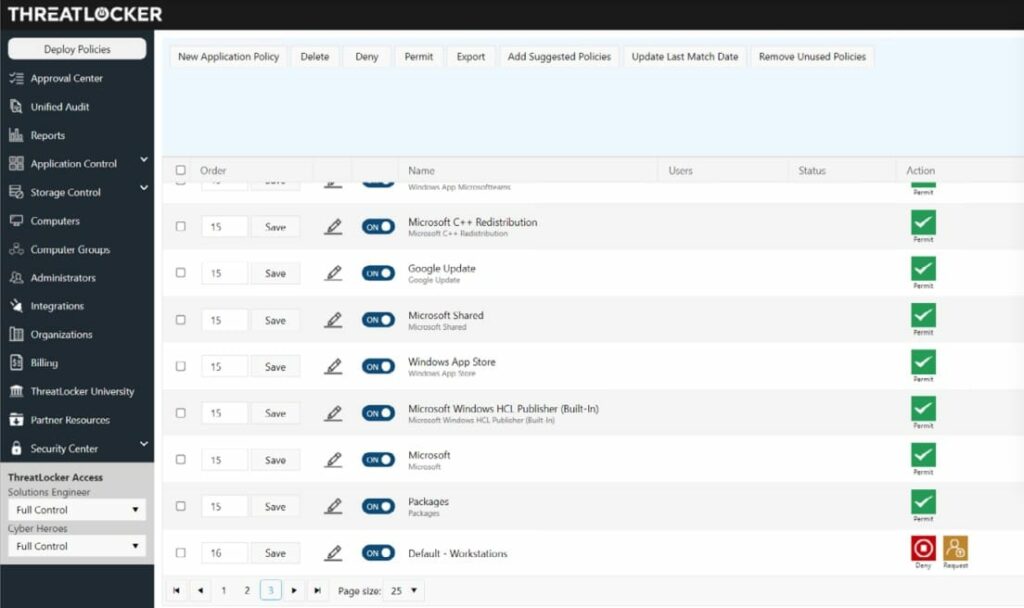
ThreatLocker Storage Control implements USB port controls from its cloud platform. Those ports can be on endpoints running Windows, macOS, or Linux and they can be located anywhere. The storage control service is part of a package of system security tools that operate through blocking all access to assets and then allowing access only to whitelisted users and applications.
Features:
- Here are some of the important features of the Storage Control system:
- Blocks all USB ports while still maintaining access by the ThreatLocker system for administration
- Allows a user to request for a device to be authorized
- Includes a device whitelist that enables a device to be used on specific devices or company-wide
- Identifies USB devices by their serial numbers
- Allows device permissions to be easily revoked
- Forms part of an application and data access control system
- Controls endpoints running Windows, macOS, and Linux
- Supports the creation of a company-wide security policy
- Access rights management that links user permissions to authorized applications for access to data stores to be able to move data
- Provides activity logging for compliance auditing
- Identifies all users that access data
- Records all users involved in USB usage
The full ThreatLocker package provides a Zero Trust Access (ZTA) architecture. It combines access controls for data loss prevention that combines user accounts, applications, and data locations. So each line in the access control manager allows only a specific user to access a specific data location through a named, approved application.
System security is implemented by disabling all software. The administrator then creates the Allowlist, which permits specific software packages to run. Thus, unexpected software, such as viruses or ransomware cannot possibly damage the protected system or access data.
Pricing: You can register for a demo of the product, a free trial, and you can obtain a customized quote.
CoSoSys Endpoint Protector

Endpoint Protector is a cross-platform Data Loss Prevention (DLP) program that comes with a host of features to comprehensively protect your data from accidental or intentional loss. In particular, it comes with advanced device control features to lock down, monitor, and manage devices and their ports easily.
Features
Here's a look at the features related to the device and USB port control.
- It works well across multiple platforms.
- Quickly grants remote and temporary access when needed. This is an important feature as it ensures that genuine requests for productivity are not hampered by stringent security policies.
- Provides precise and granular control over which teams and groups can or can't have access to USB ports.
- Generates comprehensive reports for auditing and compliance with security standards.
- Helps to adhere to your organization's security policies.
- Whitelists and blacklists users and devices as needed.
- Ensures uninterrupted workflow within your organization.
- Offers complete visibility into USB port usage, so you can reduce the possibility of insider attacks.
- Grants or revokes access to USB ports even when a device is offline.
- Protects your devices from the spread of USB malware.
- Uniquely identifies all USB-connected devices, so you can monitor them easily.
- Enforces data encryption remotely.
In all, Endpoint Protector is a comprehensive Data Loss Prevention (DLP) tool for protecting your sensitive data from accidental and intentional loss. Besides, it also provides complete control and visibility into the usage of your USB ports while its advanced reports help with internal auditing and compliance as well.
Furthermore, you can leverage the other features of Endpoint Protector too such as its content-aware protector, eDiscovery, and more to gain better protection for your confidential data and its movement through your network and devices.
Pricing: Click here to get a custom quote.
Demo: Click here to request a demo.
Summary
To recap, locking down USB ports is one of the effective ways to reduce the possibility of insider attacks and the resulting data loss. In this article, we discussed the many ways to lock down these ports for both individual devices and at the enterprise level. Out of these many strategies, the easiest and most effective option is to use third-party tools like CoSoSys Endpoint Protector as it provides complete control and visibility into the usage of your organization's USB ports. The biggest advantage of this tool is that you can monitor, lockdown, enable, and view the state of USB ports through a centralized dashboard. Such comprehensive features make this a popular choice among enterprises of all sizes.
For more such guides, browse through www.ittsystems.com.


