Security is a key component in today's business and a challenging one, given the complexity of networks and systems, not to mention their geographical spread.
Due to these reasons, securing an organization's network requires a combination of resources, policies, and platforms. Cisco ISE is one such security policy management platform that provides secure access to network resources.
This article will take a brief look into what Cisco ISE is and how to query it remotely using TACACS.
What is Cisco ISE?

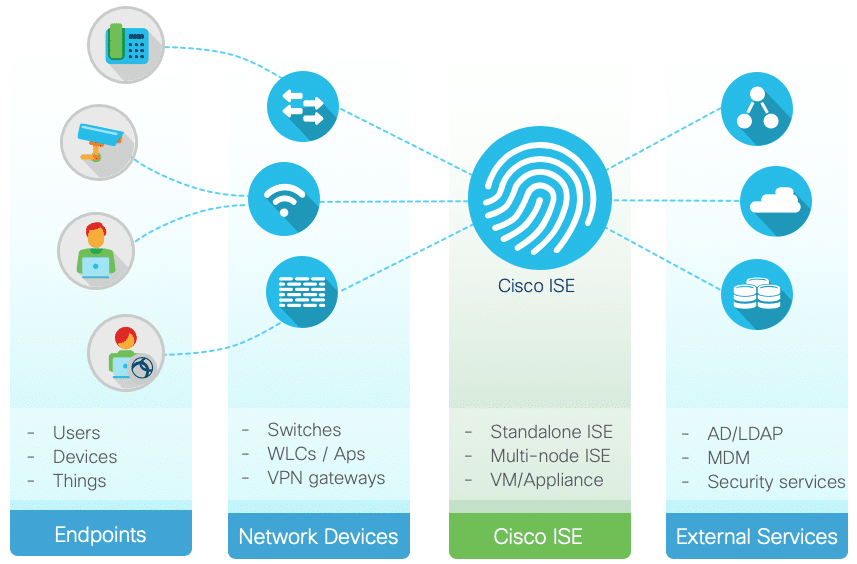
Cisco ISE is a security platform that helps enterprises streamline services, control access to resources, boost infrastructure security, gather contextual information from users and devices, and ensure compliance with prevailing security standards.
Moreover, it also provides support for discovery, profiling, and monitoring of endpoint devices on the network and combines Authentication, Authorization, and Accounting (AAA) in one platform. Finally, it supports both standalone and distributed deployments, which means it can be deployed across any kind of enterprise infrastructure.
Undoubtedly, this is a comprehensive platform that can provide many benefits for any organization.
There are many ways to control and manage this platform, and one such option is to use TACACS+.
What is TACACS+?
In short, Terminal Access Controller Access Control Server, or TACACS+, is a security protocol used for managing any AAA platform to provide a centralized authentication mechanism for users to access a particular network.
Cisco developed this protocol and built it on top of TCP. This is why it uses TCP port number 49 to send and receive packets in an encrypted form. It is mostly used for communications between the ACS server and a device and can provide granular control over every transmission. It also can separate authentication, authorization, and accounting when needed.
Now that we have a basic understanding of Cisco ISE and TACACS+ let’s see how to query Cisco ISE using TACACS+. But before that, know that you require a Device Administrator license to use TACACS.
Types of Administrators
Any user with administrator rights can create policy sets that, in turn, will enable authorization and authentication for networks. Also, this allows TACACS to send accounting messages for logging.
That said, it merits to note that there are two different types of administrators.
Device Administrator
A device administrator has admin rights for the network devices connected to Cisco ISE. This administrator has the right to configure and maintain these devices.
Cisco ISE Administrator
The Cisco ISE administrator, on the other hand, is the one who logs into the Cisco ISE platform to configure and modify the settings as needed to ensure that the network devices connect to the ISE platform.
Thus, these are the two types of administrators for this task.
You must be a Cisco ISE administrator to do the steps mentioned throughout the rest of this article.
How to Query Cisco ISE Using TACACS?
Here is a step-by-step guide on how to query Cisco ISE using TACACS+.
As a first step, check if you have admin status and if not, make sure you get one before continuing with the rest of the steps.
Open the Work Center
The Device Administration Work Center is your central point of control, and this is available only if you have the TACACS+ installed.
When you open this tool, you will see many menu options, but we will be using the most is Device Administration. This menu offers the following options.
- Identities
- User Identity Groups
- Ext ID Stores
- Network Resources
- Network Device Groups
- Policy Elements
- Device Admin Policy Sets
- Reports
- Settings
Configuring TACACS+
Use the Work Center to configure different aspects of TACACS+.
Command sets
Let's start with the command sets. There are two distinct command sets you must configure, and they are, PermitAllCommands and PermitShowCommands.
First, let's configure the PermitAllCommands command set.
- Go to Work Center > Device Administration > Policy Results > TACACS Command Sets. Click Add to create a new command set.
- In this case, give a name to the command set, which is PermitAllCommands.
- Check the box against “Permit any command that is not listed below”.
Next, configure the PermitShowCommands.
- Go to Work Center > Device Administration > Policy Results > TACACS Command Sets. Click Add to create a new command set.
- In this case, give a name to the command set, which is PermitShowCommands.
- Leave the “Permit any command not listed below” box unchecked.
- Navigate lower and look for “+Add,” and click that.
- Permit the Show and Exit commands. If the arguments are blank, it means all arguments will be included. Ideally, leave this blank unless you want to allow only some parameters.
- Finally, click Submit.
Once you have configured the command sets, the next step is to configure the profile.
Profile
To do this, go to Work Centers > Device Administration > Policy Results > TACACS Profiles. Press the Add link and in the new window, give a name for your TACACS+ profile.
Check the “Default Privilege” box and give a value of 15. Finally, click submit.
Both the above configurations provide certain privileges to the device administrator. In addition, since it works in tandem with network configurations, the chances for malicious configurations will be significantly reduced.
Authentication
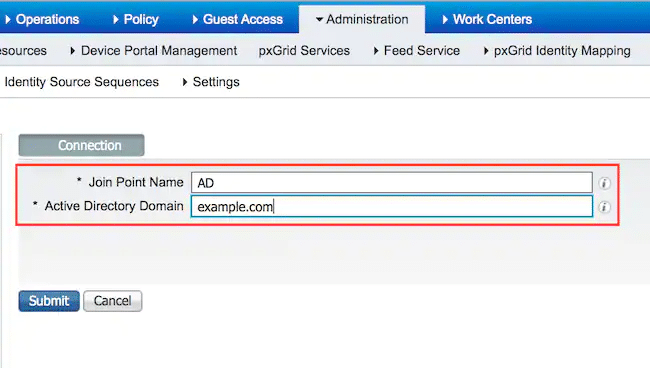
You can also set an authorization and authentication policy. By default, the authentication policy points to all AD users.
Here is how you can configure the authentication settings for a network device.
In the case of network devices, navigate to Work Centers > Device Administration > Network Resources > Network Devices > Add > TACACS Authentication Settings.

On the other hand, navigate to Work Centers > Device Administration > Network Resources > Default Devices > TACACS Authentication Settings for all other devices.
Use the following parameters to set the values.
- Shared secret: This is a string of characters that a user must enter to access the network device. The user is rejected until the correct shared secret is entered. Please note that this is not mandatory, and you can choose to skip it, though it is recommended for security.
- Enable Single Connect Mode: You can choose to have a single TCP connection for all TACACS+ communication.
- Retire: You can choose to retire the shared secret instead of deleting it.
- End: Terminates the shared secret
Protocols
As a next step, configure the protocols in your device administration protocols.
Navigate to Work Centers > Device Administration > Policy Elements > Results > Allowed Protocols and check if the device is configured for FIPS and non-FIPS modes. You can only use the Default Device Admin settings when FIPS mode is enabled.
Configure Cisco ISE
Once you're done configuring TACACS+, move to configure Cisco ISE.
Here are the steps for this configuration.
- Create a local user with full privileges on Cisco ISE.
- Create a new aaa model, define TACACS, and put it in the ISE_GROUP
aaa new-model
tacacs server ISE
address ipv4 8.4.26.51
key cisco
aaa group server tacacs+ ISE_GROUP
server name ISE
- Test the server's availability with the test aaa command. First, you must get a message stating that the user is authenticated successfully. This proves that the server is available.
- Configure logins as required.
Navigate to Operations > TACACS Livelog in case of errors and right-click on the failed commands. This will give you extensive information about the request type.
Query Cisco ISE
Now that you have configured TACACS+ and the Cisco ISE network device, it's time to query it.
You can use wildcards and regex in command sets to find the information you want.
Also, you can iterate over a command set's list to identify the matching commands. Finally, note that you can use the standard Unix regular expressions in your arguments.
Go to Work Centers > Device Administration > Reports > Reports> ISE Reports to view the reports.
Conclusion
To conclude, TACACS+ is a handy way to query your Cisco ISE and glean valuable information from it. We hope the steps mentioned above help you quickly query Cisco ISE to find the information you want.
Query Cisco ISE Using TACACS FAQs
How does TACACS work with Cisco ISE?
TACACS works with Cisco ISE by authenticating and authorizing network access requests and by providing visibility and control over network security policies.
What are some common tools used for querying Cisco ISE using TACACS?
Common tools used for querying Cisco ISE using TACACS include Cisco ISE itself, as well as third-party tools such as TACACS.net, TACACS+ Daemon (tac_plus), and FreeRADIUS.
How can I set up TACACS authentication with Cisco ISE?
To set up TACACS authentication with Cisco ISE, you will need to configure TACACS settings on both the client and server sides. You can then test the configuration to ensure that TACACS authentication is functioning correctly.
How can I troubleshoot TACACS authentication issues with Cisco ISE?
To troubleshoot TACACS authentication issues with Cisco ISE, you can use logging and monitoring tools to identify potential issues with authentication settings, network connectivity, or server performance.
What types of information can be queried from Cisco ISE using TACACS?
Using TACACS, you can query information such as user authentication status, network access policies, and security policy violations.
What types of alerts can be set up for Cisco ISE using TACACS?
Alerts can be set up for Cisco ISE using TACACS to notify administrators of issues such as authentication failures, security policy violations, and network access requests from unauthorized devices.
Can Cisco ISE be queried using TACACS in real-time?
Yes, Cisco ISE can be queried using TACACS in real-time using tools that provide real-time monitoring and alerting capabilities.


